There are 10 Archetypes to choose from in Remnant 2. However, there are an even greater number of playstyle options. Whether you want to provide high DPS or want longer survivability, these require a specific build to go along with it. In this guide, we talk about the best builds in Remnant 2, which will be perfect for your unique playstyle.
Key Takeaways
- Players can pursue a Tank build, Summoning build, and DPS, each supporting a different playstyle and is amazing in its aspect.
- I used Challenger and Engineer for the Tank build. We also picked Ford’s Scatter Gun, Double Barrel, and Royal Broadsword as weapons. Also, using the Leto Mark II armor set is vital for high survivability.
- I used Death’s Embrace Amulet and the following rings:
- Alchemy Stone
- Amber Moonstone
- Ring of Grace
- Generating Band
- Moreover, for the rings I chose:
- Burden of Mariner
- Soul Guard
- Soul Link
- Burden of the Rebel
- Moving on, we discuss one of the best DPS builds in Remnant 2 and pick the Gunslinger and Hunter archetypes. For this, you can use XMG57 Bonesaw, MP60-R, and Edge of the Forest as weapons.
- Moreover, I preferred the Gunslinger’s charm as the amulet and the following rings:
- Compulsion Loop Ring
- The Wax Sealed
- Gunslinger Ring
- The Vestige of Power
| Title | Tank Build | Summoning Build | DPS Build |
| Archetype | Challenger | Summoner | Gunslinger |
| Long Gun | Ford’s Scatter Gun | Deceit | XMG57 Bonesaw |
| Handgun | Double Barrel | Bolt Driver | MP60-R |
| Melee Weapon | Royal Broadsword | Stone Breaker | Edge of the Forest |
| Armor Set | Leto Mark II | Trainer | High Noon |
| Amulet | Death’s Embrace | Silver Ribbon | Gunslinger’s Charm |
| Rings |
|
|
|
| Traits |
|
|
|
| Skill | Juggernaut | Flyer / Reaver | Hunter’s Mark / Bullet Storm |
| Second Archetype | Engineer | Engineer | Hunter |
Tank Build
The first build we are going to talk about is a tank build. This build will be perfect for players who want to feel immortal and survive without trying. I focused immensely on armor selection, skills, and rings to increase our ability to take a hit.
Challenger Archetype
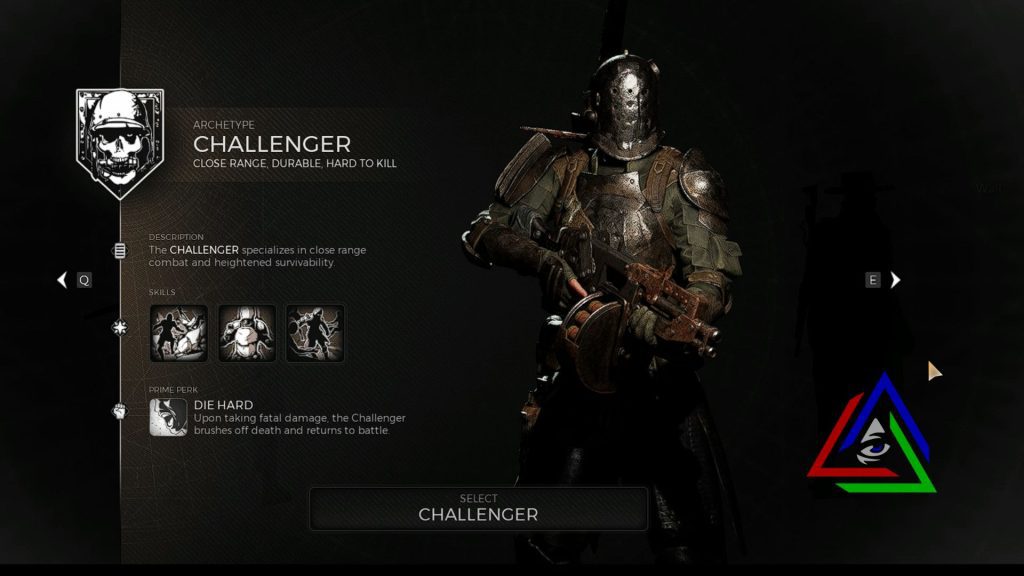
Firstly, you must choose the Challenger Archetype for this build. This class is perfect for close-range combat situations. In addition to that, it can endure large amounts of damage and is highly durable.
It favors players who want to get up close and personal with their enemies while dealing huge damage from melee attacks. They usually won’t prefer weapons with great accuracy, but we will discuss the best weapons for this build in the next section.
| Starting Stats | |||
| Health | Stamina | Armor | Weight |
| 109 | 106 | 110 | 59 |
Initially, You will receive some weapons and armor, but that won’t be the perfect choice for the best tank builds.
Best Weapon Choice
Long Gun: Ford’s Scatter Gun
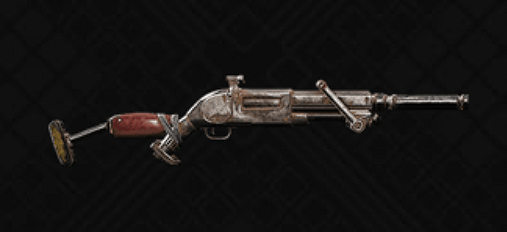
- In addition to being strong as a tank, your character must be as dangerous as a tank. You will use Ford’s Scatter Gun as the long gun weapon. This is a high-damaging shotgun, perfect for our build.
- You can get your hands on this by either choosing Explorer as your secondary archetype or from The Red Throne on the world of Yaesha.
- Simply enter the library while you have equipped the Seal of the Empress, and the floor beneath you will open. Go down, and you will easily find the weapon.
| Ford’s Scatter Gun Stats | |
| Damage (without any upgrades) | 130 |
| Damage (Fully upgraded) | 390 |
| RPS | 1.1 |
| Magazine | 7 |
| Ideal Range | 10m |
| Falloff Range | 35m |
| Max Ammo | 28 |
| Critical Hit chance | 5% |
| Weak Spot Damage Bonus | +100% |
| Stagger Modifier | 10% |
Energy Wall Weapon Mod
I used the Energy Wall Weapon Mod for our long gun. This will send out an energy barrier to prevent enemy attack projectiles from coming through for 30 seconds. In addition to that, your teammates can fire through the wall.
This weapon Mod can be found in N’Erud and can be equipped on any weapon. It requires only 500 mod power.
- Ionic Crystals x1
- Lumenite Crystal x5
- Scrap x500
Extender Mutator
Apart from the weapon mod, I recommend using Extender Mutator, allowing players to hold more ammo per magazine. Moreover, it is perfect for our weapon since its magazine is only 7. At max upgrade, it will increase by 40%.
Furthermore, this Mutator can be obtained from Yaesha after completing the Coffin Event. Defeat the mini-boss ‘Rot’, which will either be in Twisted Chantry or The Chimney.
Handgun: Double Barrel
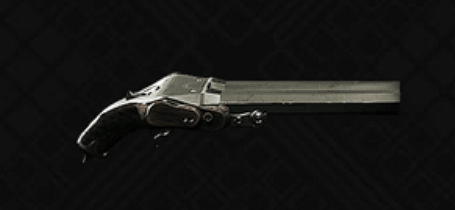
Since we want a perfect close-range character, we are going for another shotgun as a handgun. This is another extremely highly damaging gun that will suit our tank build. Weaker enemies will die by just one or two shots.
You can get a hold of this gun by heading to the Morrow Parish in Losomn. It will be inside an iron safe, and you can get the code after completing the event Head Doctor and Iron Safe.
| Double Barrel Stats | |
| Damage (without any upgrades) | 110 |
| Damage (Fully upgraded) | 330 |
| RPS | 2.3 |
| Magazine | 2 |
| Ideal Range | 7m |
| Falloff Range | 20m |
| Max Ammo | 24 |
| Critical Hit chance | 5% |
| Weak Spot Damage Bonus | 100% |
| Stagger Modifier | 10% |
Time Lapse Weapon Mod
- The weapon mod freezes and slows down enemies with a powerful detonation.
- It affects standard enemies within a 6-meter radius, freezing them for about 7 seconds.
Adding to that, it can be obtained from Losomn or crafted by Ava. For that, you will require some materials:
- Broken Time Piece x1
- Lumenite Crystal x5
- Scrap x500
Lithely Mutator
- After defeating each enemy during reloads, reload speed increases by 3%.
- The effect lasts 7 seconds and can stack up to 5 times.
- Fully upgraded, it boosts reload speed by 7%.
- Acquired in Harvester’s Reach in Losomn, dropped by Barghest the Vile.
Melee Weapon: Royal Broadsword
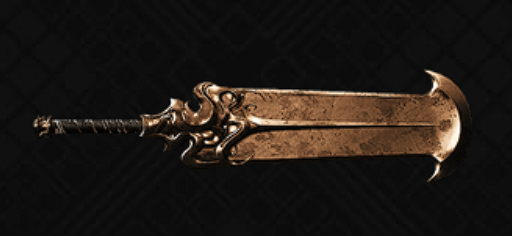
- An outstanding melee weapon with 102 damage per hit.
- Previously owned by Pan’s royal guards.
- It has an aesthetic design and fits well in tank builds.
- Obtainable in The Red Throne, Yaesha, by completing the “Arrest” event.
- Note: I discovered this weapon has no built-in Weapon mod, but I was able to add it later.
| Royal Broadsword Stats | |
| Damage (without any upgrades) | 102 |
| Damage (Fully upgraded) | 306 |
| Critical Hit chance | 7% |
| Weak Spot Damage Bonus | +95% |
| Stagger Modifier | 11% |
Shield Breaker Mutator
This will be the perfect Mutator for making one of the best tank builds.
- Grants a shield of 2% of max health after every melee attack.
- Synergizes perfectly with melee-focused builds.
- Maximum shield capacity of 20%, lasting for 10 seconds.
- Obtainable from Dwell for 75 Relic Dust and 500 Scrap.
Leto Mark II Armor Set
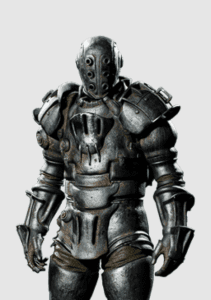
Each armor ranges from Light to Ultra Heavy; I used the Ultra Heavy armor. The reason for this is the insane defensive capabilities. However, it will take longer to dodge attacks and consume some stamina.
| Stats | Body Armor | Gloves | Head Armor | Leggings |
| Armor | 83 | 17 | 22 | 46 |
| Weight | 44 | 10 | 13 | 23 |
| Bleed Defense | 3 | 2 | 2 | 3 |
| Burn Defense | 4 | 1 | 3 | 2 |
| Shock Defense | 4 | 2 | 1 | 3 |
| Blight Defense | 5 | 1 | 1 | 3 |
| Toxin Defense | 3 | 3 | 2 | 2 |
So, after wearing all that together, your overall armor stats become:
| Leto Mark II Set | |
| Stats | Overall |
| Armor | 168 |
| Weight | 90 |
| Bleed Defense | 10 |
| Burn Defense | 10 |
| Shock Defense | 10 |
| Blight Defense | 10 |
| Toxin Defense | 10 |
You can find armor in Ward 13. However, you will have to be on Labyrinth to obtain it initially.
Amulet And Rings
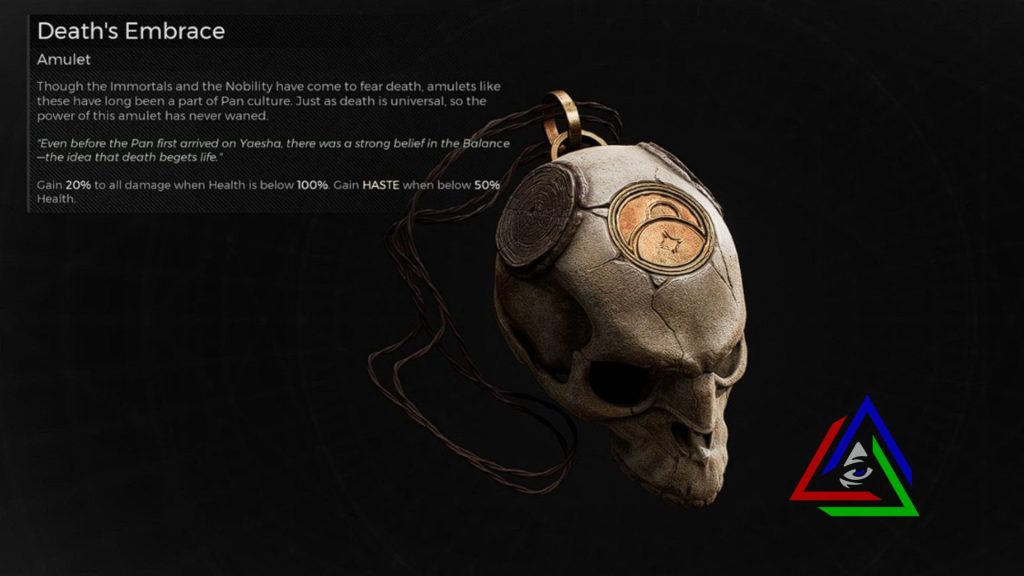
Amulet: Death’s Embrace
- Provides a 20% damage buff when health is below 100%.
- Grants the ‘Haste’ effect if health falls below 50%.
- Available in Yaesha or from Bedel of the Vaunnt merchant for 400 scraps.
Along with one amulet, you can equip 4 Rings at one time. For this build, we will use the following:
- Alchemy Stone: Increases base Lifesteal by 5% with a Blight effect or negative ‘Status.’ Obtainable from Losomn.
- Amber Moonstone: Reduces all damage received by 25% when health is below 30% and grants immunity to temporary status effects.
- Ring of Grace: Automatically restores 10% of max health over 10 seconds when damaged by an enemy.
- Generating Band: Regenerates 3 Maximum Health per second with an active shield.
Traits
Traits are passive abilities that are vital to enhance your build. You must choose the best traits for the most effective gameplay. These are the five traits you need for a tank build.
| Trait | Effect (Max Upgrade) |
| Barkskin | All Damage received is decreased by 10% |
| Blood Stream | Grey Health Regeneration improved by 3.0/second. |
| Siphoner | Lifesteal improved by +3% |
| Shade skin | Resistance to Elemental damage is improved by 20% |
| Arcane Strike | Mod Power Generation from melee attacks is improved by 50%. |
Skill
From the three available skills for a challenger archetype, I used Juggernaut. It is because we need access to three stacks of Bulwark and increase movement speed by 15%. Moreover, melee attacks get an insane 50% damage buff.
All this lasts for 25 seconds. At the same time, the cooldown time for this skill is 60 seconds.
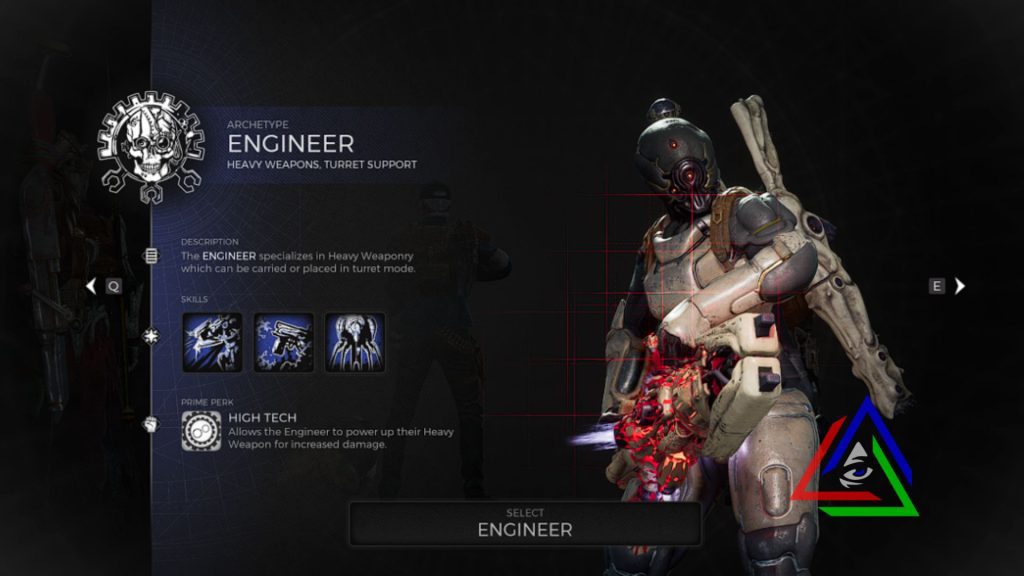
A cool feature Remnant 2 has is the ability to choose a dual archetype and benefit from his traits. We will choose the Engineer as the second archetype due to its immense armor buff.
Thanks to its archetype trait, ‘Fortify,’ your armor effectiveness will rise by 50%. In addition to that, the Heavy Mobility perk will increase your mobility drastically. You will move a staggering 35% faster when holding a heavy weapon.
The engineer will perfectly complement the challenger archetype when we try out one of the best builds in Remnant 2.
Summoning Build
The next build on my list is the Summoning build. I focused on improving our summons to help us in battles for this build. Moreover, we will focus on their DPS while the players will equip long-ranged and accurate weapons.
Summoner Archetype
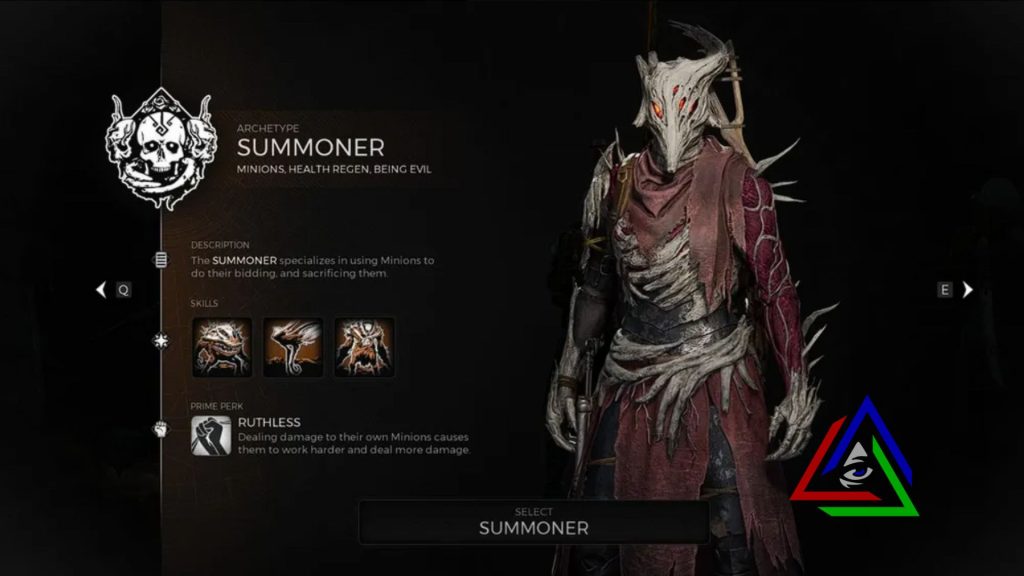
As our first archetype, we will be choosing the summoner. Unfortunately, I found that it is not available at the start, and you will have to dig into the campaign first. I am using it to control the minions to fight enemies.
Rather than battling yourself, you can give your minions damage and speed buffs for fighting enemies. Also, healing auras will spawn in their place when your minions expire.
To initially unlock the summoner, you must craft the ‘Tome of the Bringer’ Engram. You must first craft a ‘Faded Grimoire’ using Blood Moon Essence.
Best Weapon Choice
Long Gun: Deceit
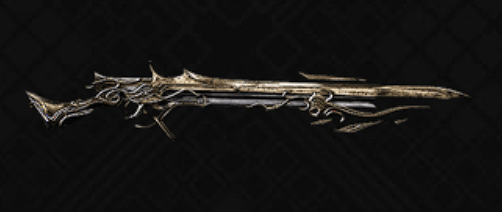
This weapon has not only fantastic damage but also amazing accuracy. Deceit is perfect for long-range battles. Moreover, after upgrading this, weaker enemies may easily die from a single shot.
Also, you can obtain this gun by crafting it at McCabe. For that, you will require the following:
- Imposters Heart x1 (obtained from Faelin boss fight)
- Lumenite Crystals x7
- Scrap x650
| Deceit Stats | |
| Damage (without any upgrades) | 120 |
| Damage (Fully upgraded) | 360 |
| RPS | 2 |
| Magazine | 6 |
| Ideal Range | 28m |
| Falloff Range | 75m |
| Max Ammo | 30 |
| Critical Hit chance | 15% |
| Weak Spot Damage Bonus | 90% |
| Stagger Modifier | -5% |
Ouroboros Weapon Mod
- Weapon Mod: Deceit
- Default attachment cannot be removed.
- Summons three sword fragments around the player for 30 seconds.
- Useful for melee damage in a flexible build focused on rings, amulets, perks, and skills.
Extender Mutator
Using the extender, Mutator allows the player to store more bullets in the magazine.
- In my experience, it increases magazine capacity, beneficial for this weapon.
- At full upgrade, it increases magazine capacity by 40%.
- Obtained from Yaesha after completing the Coffin Event and defeating the ‘Rot’ boss.
Handgun: Bolt Driver
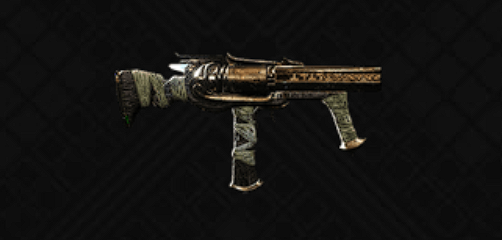
- Bolt Driver Handgun is underrated but effective.
- It is ideal for close combat and has high accuracy with great DPS.
- Suitable for a summoner build where you want to avoid damaging summons.
- Obtainable from the Water Harp on Yaesha by playing the secret song with the numbers 1,4,0,2,5,0,3,0.
| Bold Driver Stats | |
| Damage (without any upgrades) | 26 |
| Damage (Fully upgraded) | 78 |
| RPS | 7.4 |
| Magazine | 24 |
| Ideal Range | 17m |
| Falloff Range | 52m |
| Max Ammo | 96 |
| Critical Hit chance | 10% |
| Weak Spot Damage Bonus | 105% |
| Stagger Modifier | -10% |
Helix Weapon Mod
This amazing weapon mod has a mod power requirement of 850. This is great when dealing with a crowd of enemies because it fires missiles that inflict 120 damage.
Moreover, there are two ways to get this Weapon Mod. The first is to explore N’Erud, and the second is to craft it at Ava’s. For that, however, you will require:
- Seeker Residue x1
- Lumenite Crystal x5
- Scrap x500
Harmonizer Mutator
This improves the damage dealt from weapon mods by 10% at the first level. At max level, however, it improves damage dealt by 25%. Furthermore, it is sold by Dwell for only 75 Relic Dust and 500 Scraps.
Melee Weapon: Stone Breaker
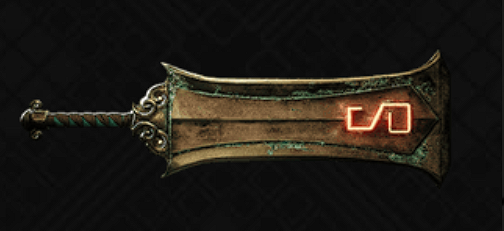
Since our long gun focuses on long-range battles, our handgun and melee weapon must be extremely dangerous, so choosing the Stone Breaker is perfect, thanks to its great damage.
I unlocked this weapon by crafting it from McCabe. The materials required include:
- Hollow Heart x1 (In Yaesha, Great Bole. Otherwise, dropped by the Corrupter boss)
- Lumenite Crystal x7
- Scrap x650
| Stone Breaker Stats | |
| Damage (without any upgrades) | 103 |
| Damage (Fully upgraded) | 309 |
| Critical Hit chance | 4% |
| Weak Spot Damage Bonus | 95% |
| Stagger Modifier | 10% |
Faultline Weapon Mod
- Stone Breaker has a default weapon mod, Faultline, that cannot be replaced.
- The mod generates shockwaves, dealing 115 damage. (345 at max level)
- Costs 35 stamina to generate the shockwaves.
Dervish Mutator
- Mutator provides a melee damage buff of up to 40%.
- Buff lasts for 10 seconds.
- Obtainable by purchasing it from Dwell for 75 Relic Dust and 500 Scrap.
Trainer Armor Set
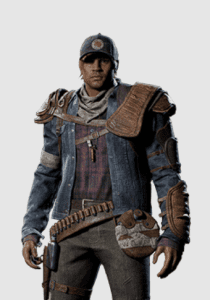
When creating the best summoners builds in Remnant 2, one of the best choices that I recommend will be the Trainer set as the armor. However, you can also pick any other medium armor set in this case, but the Trainer set seems to have a slight edge.
In addition to having decent armor of 67, it is very lightweight. Making your character dodge swiftly without much hassle. Moreover, you don’t need cumbersome armor because you’ll be playing from long-range against enemies.
| Stats | Trainer clothes | Trainer Bracer | Trainer Cap | Trainer Boots |
| Armor | 36 | 7 | 7 | 18 |
| Weight | 18 | 3 | 4 | 8 |
| Bleed Defense | 3 | 2 | 0 | 1 |
| Burn Defense | 0 | 0 | 0 | 0 |
| Shock Defense | 4 | 3 | 0 | 1 |
| Blight Defense | 1 | 1 | 0 | 1 |
| Toxin Defense | 3 | 1 | 1 | 2 |
So, after wearing all that together, your overall armor stats become:
| Trainer Set | |
| Stats | Overall |
| Armor | 67 |
| Weight | 33 |
| Bleed Defense | 6 |
| Burn Defense | 0 |
| Shock Defense | 8 |
| Blight Defense | 3 |
| Toxin Defense | 7 |
The Trainer set armor can be obtained in two ways:
- In Ward 13, this armor is sold by the Whispers merchant. They were introduced in the previous edition of the game.
- This armor set is given when you choose the Handler archetype.
Amulet And Rings
Amulet: Silver Ribbon
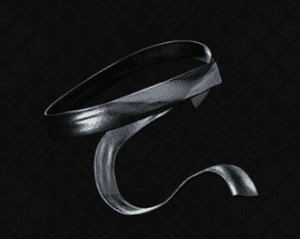
The reason I chose silver ribbon is simple. I wanted to maximize the damage done by summons. To be precise, the amulet will improve your skill damage by 25%. Moreover, it will also activate ‘Haste’ for 15 seconds.
As for the location of this amulet, you will have to travel to Losomn. You must visit the two statues which are holding hands. After that, when you are in the Dark World, utilize the Plain ribbon on the Statue to get the Amulet required.
As for the four rings you can equip, you will want to choose the following:
- Burden of Mariner ring reduces skill cooldown time by 25% and increases Mod Power generation for cooling-down skills by 10%.
- Obtainable through exploration in N’Erud or crafting at Drzyr Replicator for 500 scraps and 10 iron.
- Soul Guard increases a stack of ‘Bulwark’ for each active summon and can be crafted at the ‘Bloodmoon Altar’ using Blood Moon Essence or found in Yaesha.
- Soul Link boosts the summoner’s health by 5% of the damage their summons deal and can be found randomly in Yaesha.
- Burden Of The Rebel ring reduces skill cooldown time by 15% and is obtained by giving the Thaen Seed to the Eternal Empress in Yaesha. You can learn about it in our Remnant 2 Thaen Seed guide.
Traits
As for the passive abilities known as traits, you will want abilities that will benefit the summons. You must get a hold of the following three traits and max them out quickly.
| Traits | Effects (Fully Upgraded) |
| Expertise | A core trait, meaning you will have it from the get-go. It will decrease skill cooldown time by 20%. |
| Rugged | The health of summons will be improved by 100%. |
| Blood Bond | Your summons will take 10% of the damage that you take. Hence, you will take 10% less damage. |
Skill
For the summoner archetype, there are three skills available:
- Hollow Minion (unlocked automatically)
- Flyer (unlocked at level 5)
- Reaver (unlocked at level 10)
I used Reaver’s skill to access the Minion assist in the battle. It comes with a cooldown of 117.6 seconds, but the addition of rings and traits will greatly reduce its impact.

- Engineering class is the ideal second archetype for this build.
- It offers a deployable turret skill, with ‘Heavy weapon: Impact Cannon’ being the best choice.
- This class’s ‘Metalworker’ perk provides a 50% skill damage buff.
- This synergy complements the summoner’s abilities, creating a potent Summoning Build.
DPS Build
If you want to provide large amounts of damage in a short amount of time, then this build is for you. It includes two archetypes, Gunslinger and Hunter, and I will focus on maximizing DPS. Hence, active skills and weapons will be an important selection.
Gunslinger Archetype
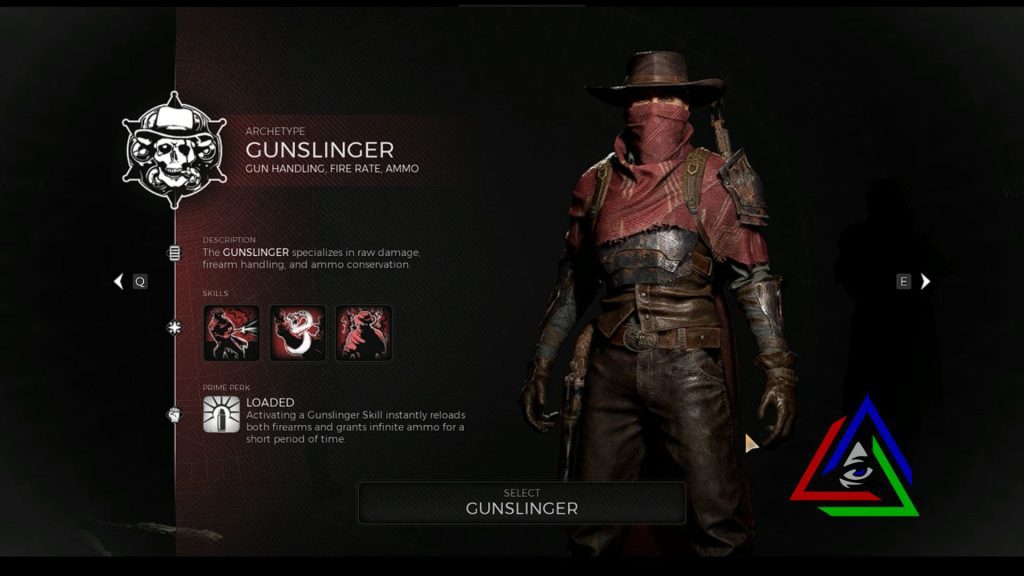
- It Focuses on heavy firearm damage and ammo conservation.
- Perks and skills benefit the fire rate and DPS.
- Favors mid-ranged battles.
- It can be chosen as the starting archetype if pre-ordered or unlocked using the Wood Cylinder from Mudtooth.
Best Weapon Choice
Long Gun: XMG57 Bonesaw
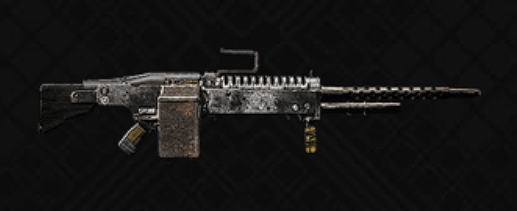
Perfect for our build, the Bonesaw is a fully automatic machine gun. In addition to that, it can work in a variety of ranges.
On the other hand, the accuracy isn’t as great at times. Nevertheless, it has an extremely high fire rate of 9.5 and is a dangerous weapon.
To get your hands on this weapon, visit Brabus in Ward 13. Moreover, it can be obtained by choosing the Medic archetype, but that’s totally on you.
| XMG57 Bonesaw Stats | |
| Damage (without any upgrades) | 12 |
| Damage (Fully upgraded) | 36 |
| RPS | 9.5 |
| Magazine | 150 |
| Ideal Range | 19m |
| Falloff Range | 45m |
| Max Ammo | 300 |
| Critical Hit chance | 10% |
| Weak Spot Damage Bonus | 100% |
| Stagger Modifier | 0% |
Hot Shot Weapon Mod
Since we want to focus on firearms, increasing their damage from range seems to be the perfect choice. Hence, using the Hot Shot weapon mod will improve ranged damage by 15% and apply burning damage of 200 for 10 seconds.
There are two ways you can get a hold of this Weapon Mod:
- Craft from Ava McCabe using Root Ganglia.
- Buy it from Ava McCabe for only 1,500 scraps.
Refunder Mutator
For the best high DPS build, I would want to avoid spending time reloading. This is where this mutator is helpful. This gives you a 20-50% chance of having the spent ammo returned to your magazine.
Consequently, if you plan on obtaining this, head onto N’Erud and defeat the E.D. Alpha boss found in the ‘Tower of the Unseen.’
Handgun: MP60-R
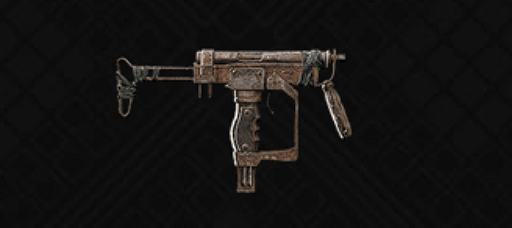
- High fire rate machine pistol.
- Deadly in close range and powerful situations.
- Obtained by:
- Choosing the Summoner archetype
- Opening Ford’s chest in Ward 13 with the four-digit code on the bottom of his flashlight.
- Using the Cargo Controls Key to open the locked door near the containers in Ward 13.
| MP60-R Gun Stats | |
| Damage (without any upgrades) | 9 |
| Damage (Fully upgraded) | 27 |
| RPS | 14.2 |
| Magazine | 42 |
| Ideal Range | 17m |
| Falloff Range | 50m |
| Max Ammo | 252 |
| Critical Hit chance | 10% |
| Weak Spot Damage Bonus | 100% |
| Stagger Modifier | 0% |
Concussive Shot Weapon Mod
- Launches a blast of air through enemies in an 8-meter radius.
- Inflicts 155 damage to all enemies.
- Mod Power requirement: 500.
- You can acquire for 1,500 scraps from Ava or craft using Root Ganglia material for increased DPS.
Bandit Mutator
- Offers a 10% chance to return ammo to the magazine.
- Returned ammo has a 10% improved fire rate.
- Obtainable in Yaesha after defeating ‘The Weald Stalker and The Gnarled Archer’ duo bosses.
Melee Weapon: Edge Of The Forest
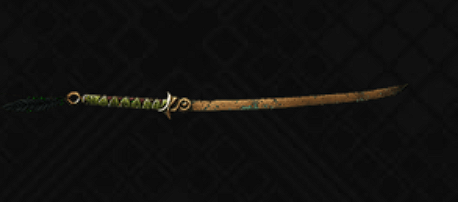
This melee weapon is a stylish and lightweight sword that inflicts large damage. However, it is important to note that we will mainly fight with long guns or handguns. But having a good melee weapon is still worth spending time on.
The sword can be obtained from Imperial Gardens, close to the checkpoint location.
| Royal Broadsword Stats | |
| Damage (without any upgrades) | 59 |
| Damage (Fully upgraded) | 177 |
| Critical Hit chance | 9% |
| Weak Spot Damage Bonus | 105% |
| Stagger Modifier | -15% |
Vengeful Strike Mutator
Even though we won’t use melee weapons often, you may need a strong weapon in intense situations. Having this mutator attached to your weapon will be perfect for when your health is low.
- Deal 20% more damage when health is below 50%.
- Obtainable in Labyrinth World after defeating Bastion during the Bastion event.
High Noon Armor Set
For the DPS builds, I will focus on having an armor set that doesn’t weigh us down. But also, it should not be fragile and must be able to take a hit or two. However, we will use the head armor of the challenger instead.
| Stats | High Noon Armor |
High Noon Gloves |
Bruiser Helmet | High Noon Soles |
| Armor | 38 | 8 | 15 | 18 |
| Weight | 19 | 6 | 9 | 10 |
| Bleed Defense | 0 | 0 | 1 | 0 |
| Burn Defense | 4 | 2 | 2 | 3 |
| Shock Defense | 4 | 2 | 0 | 2 |
| Blight Defense | 0 | 0 | 0 | 0 |
| Toxin Defense | 2 | 1 | 1 | 2 |
So, after wearing all that together, your overall armor stats become:
| High Noon Set | |
| Stats | Overall |
| Armor | 79 |
| Weight | 44 |
| Bleed Defense | 1 |
| Burn Defense | 11 |
| Shock Defense | 8 |
| Blight Defense | 0 |
| Toxin Defense | 6 |
There is only one way to get most of this set apart from the helmet. And that is choosing the Gunslinger archetype. And since we are already on that archetype, you don’t need to do anything to get this.
Moreover, the Bruiser helmet can be bought from whispers in Ward 13 or obtained by choosing the Challenger class.
Amulet And Rings
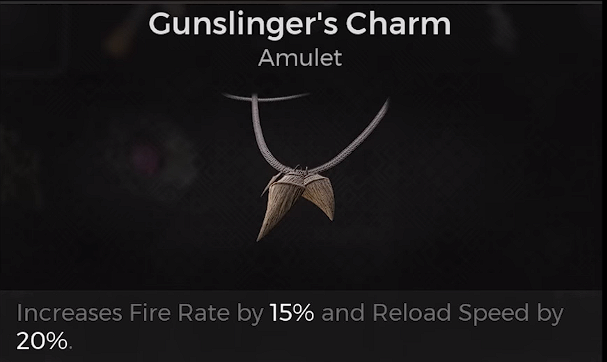
Amulet: Gunslinger’s Charm
I am going with this because of its amazing fire rate and reload speed buff. This amulet fits perfectly since we focus on dealing high damage per second without reloading.
It improves the fire rate by 15% and increases the speed of reloading the weapon by 20%. You can obtain this by visiting Ward 13 after you finish the Second World and asking him about his stories multiple times.
Apart from this amulet, you must also equip four rings to improve this build greatly. These include:
- Compulsion Loop Ring: Provides 5% fire rate and melee attack speed after defeating an enemy for 7 seconds.
- Wax Sealed Ring: Offers a 4% ranged damage buff after killing blows for 15 seconds. Found in The Far Woods in Yaesha.
- Gunslinger Ring: Enhances reload speed by 10% and weapon swapping speed by 30%. I found it in Ward 13 by asking Mudtooth about his stories.
- Vestige of Power: Grants a 10% ranged and melee damage buff if not hit for 7 seconds. Located in Yaesha’s Faithless Ticket area.
Traits
Apart from the core traits given to every archetype at the beginning, you can unlock many other traits throughout the game. For this build, you must focus on the following four traits complementing our high DPS build.
| Traits | Effects (Fully Upgraded) |
| Handling | Weapon recoil and spread will reduce greatly by 40%. |
| Footwork | You will be able to strafe faster when aiming by 50%. |
| Ammo Reserves | The most important trait improves ammo reserves by a staggering 50%. |
| Longshot | Hunter’s trait boosts the weapon’s ideal range by 600cm. |
Skill
- As for the skills to be chosen from Hunter and Gunslinger, I am using Hunter’s Mark and Bullet Storm, respectively.
- Bullet storm is the skill unlocked at level 10, and boosts fire rate by 20%, while also increasing reload speed by 50%. (Has a cooldown of 57.6 seconds)
- Hunter’s mark is the automatically unlocked skill from the Hunter archetype.
- This ability will mark all enemies within a 35-meter radius while increasing ranged and melee damage by 15%. This skill lasts for 25 seconds and has a cooldown of 67.2 seconds.
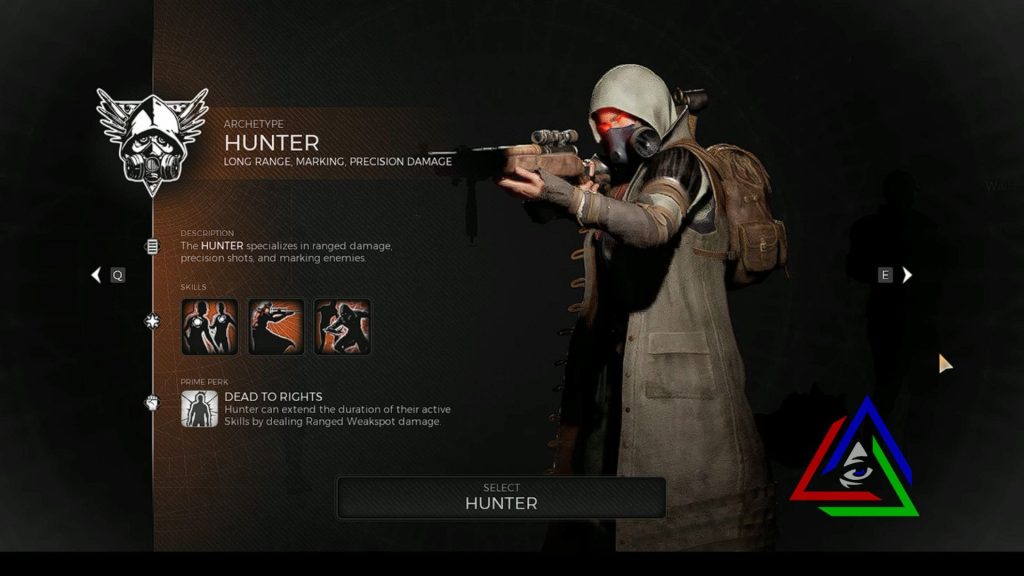
In Remnant 2, two classes focus on dealing with high DPS; I picked both. Thanks to its perks and traits, Hunter is the perfect archetype to be paired with Gunslinger.
With massive help from Urgency Utility Perk, your weapons will reload 15% faster, and you will get a 15% movement buff. In addition to that, the Deadeye Damage Perk is perfect. Since it improves, 24% ranged damage and 9% weak spot damage.
My Opinion
And with that, we conclude our guide on the best builds in Remnant 2. Remember that there are dozens of different builds, each favoring separate playstyles. It all lies in a little experimentation and testing with my builds to easily pursue the ideal build for your playthrough. If you want to read more about Remnant 2, check these out:
Good job! Please give your positive feedback ☺️
How could we improve this post? Please Help us. 🤔
Muzammil is a cinephile and an art enthusiast from a very young age. Currently enrolled as a student for a bachelor’s in Artificial Intelligence. Loves to explore the lore and the depth of video games such as Elden Ring and Dark Souls. Enjoys consuming comics and manga. Currently, he is Siphoning his love for games as a news writer at Gamesual. He has gained experience in guide and news writing for about a year. If you have any queries, feel free to reach out to him on Steam: MakChan


